
Last week was last week: we drove to Las Vegas to learn about last- and shoe-making from Ray Klose, who makes beautiful custom climbing shoes. He taught us a couple fancy tricks to make perfect lasts that we can't share, but the basic process goes as follows:
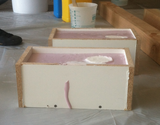 Cast a one-use material around your feet. Pour a hard plastic in the one-time mold.
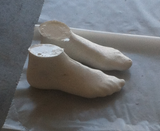 Remove the hard plastic cast. This is the basis of the custom last. Trim and adjust the last as needed. For example, I didn't do a perfect job of holding my feet in the same position, but Ray was able to adjust the left to match the right by skilled trimming and gluing. Mak and I tried to help out where an extra pair of hands was needed, but much of the artistry we just had to watch, document, and absorb.
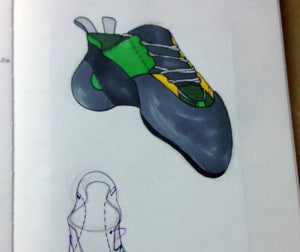
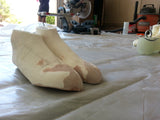 Roughen the surface of the cast lasts and sculpt out the final shape of the shoe. For SFT, we wanted shoes that were more generic in shape that the ones Ray usually makes. This will let us share the first pairs of shoes made on these lasts with user testers who have similarly sized feet. This means that many of the peculiarities of our lasts were smoothed out so that the final shoes wouldn't be too customized for other people to wear.
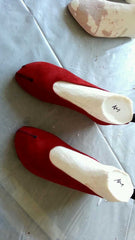 Ray showed us how to make quick masking tape patterns from our lasts to check sizing. He made up a couple of slippers that we tried on. They fit like gloves! Since the lasts passed this test, Ray will begin making two pairs of shoes in our design. We'll be working with him remotely for the next week as he builds them, and then he'll ship them to us for climb testing.
]]>


 Cast a one-use material around your feet. Pour a hard plastic in the one-time mold.
  Remove the hard plastic cast. This is the basis of the custom last. Trim and adjust the last as needed. For example, I didn't do a perfect job of holding my feet in the same position, but Ray was able to adjust the left to match the right by skilled trimming and gluing. Mak and I tried to help out where an extra pair of hands was needed, but much of the artistry we just had to watch, document, and absorb.
 Roughen the surface of the cast lasts and sculpt out the final shape of the shoe. For SFT, we wanted shoes that were more generic in shape that the ones Ray usually makes. This will let us share the first pairs of shoes made on these lasts with user testers who have similarly sized feet. This means that many of the peculiarities of our lasts were smoothed out so that the final shoes wouldn't be too customized for other people to wear.
 Ray showed us how to make quick masking tape patterns from our lasts to check sizing. He made up a couple of slippers that we tried on. They fit like gloves! Since the lasts passed this test, Ray will begin making two pairs of shoes in our design. We'll be working with him remotely for the next week as he builds them, and then he'll ship them to us for climb testing.